
How to Install Cabinets? A Step-by-Step Guide
Installing cabinets may seem daunting, but with the right approach, it can transform your space efficiently and beautifully. At MILLENNIUM DESIGNS, we’ve guided countless homeowners in Scottsdale, AZ, through seamless cabinet installation, ensuring both functionality and style. Whether upgrading your kitchen, bathroom, or storage area, understanding how to install cabinets correctly can save time, prevent costly mistakes, and elevate your home’s aesthetic.
Proper cabinet installation doesn’t just improve appearance; it also affects usability and longevity. Knowing what to do, what to avoid, and when to seek professional help ensures that your investment stands the test of time.
Why Learning How to Install Cabinets Matters
Cabinets are more than storage; they define your room’s look and usability. Improper installation can lead to misaligned doors, uneven countertops, or structural issues. Learning the proper installation process empowers homeowners to:
- Avoid common errors like gaps or uneven mounting
- Maximize storage efficiency
- Ensure longevity and durability of cabinetry
- Boost property value with a polished, professional finish
Additionally, understanding the process gives you confidence, whether you’re taking on a DIY project or managing a professional installation. When homeowners understand what goes into a proper installation, they’re better equipped to plan, troubleshoot, and make informed decisions.
Tools and Materials You’ll Need
Before diving in, gather the essential tools and materials. Proper preparation makes the installation process smoother and safer. Here’s a checklist:
Tools:
- Drill and drill bits
- Level and measuring tape
- Stud finder
- Screwdriver set
- Clamps
- Carpenter’s square
- Rubber mallet for adjustments
Materials:
- Cabinets (pre-assembled or flat-pack)
- Screws and anchors
- Shims for leveling
- Wood filler and caulk for finishing touches
- Cabinet adhesive (optional for added stability)
Organizing your tools and materials in advance prevents mistakes and wasted time. A clean, well-lit workspace also contributes to more precise measurements and smoother installation.
Step 1: Prepare Your Space
A well-prepared space is the foundation of successful cabinet installation. Begin by:
- Clearing the area – Remove old cabinets, appliances, or obstacles.
- Inspecting the walls – Check for uneven surfaces, studs, or damage.
- Marking reference lines – Use a level to draw the baseline where cabinets will sit.
- Confirming floor level – Check for uneven flooring; minor adjustments will save major headaches later.
Preparation at this stage ensures your cabinets align perfectly and function smoothly. Taking the time to inspect walls and floors also prevents common problems, such as tilted or misaligned units, that can compromise both aesthetics and function.
Step 2: Measure and Plan Your Layout
Accurate measurements are critical. Follow these steps:
- Measure the wall space, including height, width, and depth.
- Plan spacing for appliances, electrical outlets, and plumbing.
- Sketch your layout to visualize cabinet placement.
- Consider door swing and drawer clearance to avoid obstructions.
A well-thought-out plan prevents issues like cramped spaces or misaligned doors. Double-check all measurements, as small errors at this stage can become costly mistakes later. Consider creating a mock layout on the floor using painter’s tape to visualize spacing and ensure accuracy.
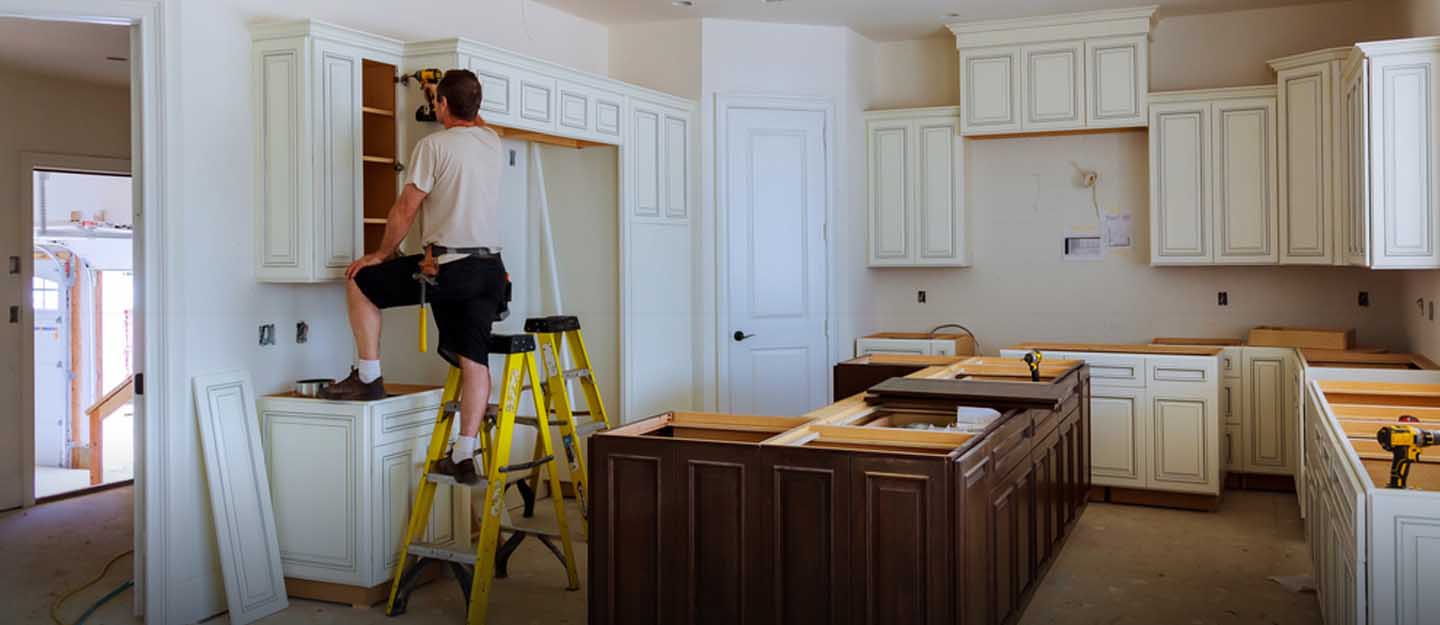
Step 3: Install Wall Cabinets First
Wall cabinets are installed first because they define the placement of base cabinets.
- Locate studs – Use a stud finder to anchor cabinets securely.
- Mark mounting points – Transfer your reference lines to studs for consistent alignment.
- Secure cabinets – Lift each cabinet into place, shim if necessary, and screw into studs.
- Check alignment – Use a level to ensure precision after each installation.
Tip: Enlist help for heavy cabinets or use temporary supports to keep cabinets in place. Wall cabinets should be installed at a comfortable height, typically 18 inches above the countertop, unless your design specifies otherwise.
Step 4: Install Base Cabinets
Base cabinets support countertops, so leveling is critical.
- Check floor level – Use shims to correct uneven surfaces.
- Position and secure – Place cabinets along the baseline and anchor them to studs.
- Join cabinets – Clamp adjacent cabinets and fasten together for seamless alignment.
- Double-check alignment – Ensure cabinet fronts are flush; even minor misalignments can affect the countertop installation.
Remember, base cabinets set the foundation for countertops and appliances. A careful approach here ensures the rest of your kitchen or bathroom installation goes smoothly.
Step 5: Add Doors, Drawers, and Hardware
Once cabinets are secured:
- Attach doors and drawers according to manufacturer instructions.
- Install handles, knobs, and other hardware.
- Adjust hinges for smooth operation and consistent gaps.
- Test all doors and drawers to ensure proper alignment and functionality.
This finishing step completes the functional aspect of your cabinets while enhancing aesthetics. Take time to make small adjustments; precision here can elevate the overall appearance and longevity of your cabinetry.
Pro Tips for a Professional Finish
- Use a level continuously – Even minor deviations can compound across multiple cabinets.
- Work with quality screws and anchors – Ensure stability and durability.
- Consider soft-close mechanisms – Adds a luxury touch and prevents wear over time.
- Seal gaps and edges – Caulk and wood filler give a polished, professional appearance.
- Label cabinets during installation – Simplifies assembly when installing multiple units or for future adjustments.
- Keep a clean workspace – Remove sawdust and debris to avoid scratches or accidental damage.
These small adjustments often make the difference between a functional installation and a truly professional-looking result.
Common Mistakes to Avoid
- Ignoring stud placement, leading to weak mounting
- Skipping shims for uneven floors, causing misalignment
- Over-tightening screws, which can damage cabinet material
- Rushing measurements or layout planning, resulting in gaps or crooked units
- Neglecting appliance or outlet clearance, causing conflicts during installation
Awareness of these pitfalls allows homeowners to anticipate challenges and maintain a smooth workflow, avoiding frustration and rework.
Why Professional Installation Can Make a Difference
While DIY installation is rewarding, some projects benefit from professional expertise:
- Complex layouts with multiple corners or angles
- Heavy or oversized cabinets
- Integration with appliances, plumbing, or electrical systems
- High-end materials that require careful handling
Our experienced team ensures every cabinet is installed accurately, securely, and efficiently, giving your space a flawless finish without stress. From precise leveling to perfect alignment, professional installation ensures your cabinets function flawlessly and look spectacular for years to come.
Conclusion
Learning how to install cabinets is empowering, but success depends on preparation, precision, and patience. From measuring your space to installing wall and base cabinets, each step contributes to a long-lasting, visually appealing result. Whether tackling a DIY project or considering professional help, understanding the process equips you with the knowledge to make informed decisions and avoid costly mistakes.
For homeowners in Scottsdale, AZ, looking for reliable and professional cabinet installation, MILLENNIUM DESIGNS combines expertise with exceptional service to bring your vision to life. Our team ensures your cabinets are not only functional but also enhance your home’s beauty and value.
Ready to transform your space? Explore at getcabinetsnow.com and experience the difference of expert craftsmanship today.